Hatches and the lander with recovery system folded inside:
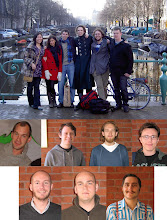
Group photo, from left: patrik ahlén, joakim sandström, christian jonsson, johan juhlén and johan thelander, on floor erik sund. LAPLander hanging on a string (as the swedish saying...).
 Hatches and the lander with recovery system folded inside:

 En vanlig D-sub 9 connector ansluter Rocket Socket med NSSB. Själva boxen är tillverkad av materialet VeroWhite. Ett stort tack till Top Notch Design som tillverkade den med deras 3D-skrivare. Sju pinnar går upp i Dummyn ifrån Rocket Socket. Sex elektriska samt en mekanisk.
 Som sett ovan på de två bilderna så liknar de tillverkade delarna det som var uttänkt i vid design i Solid Egde. Det är en speciell känsla att få en kravspesifikation och lösa uppgiften fram tills den skall användas. HÄRLIGT!
The airbag was attached to the tank which was filled with around 6 g of co2.
1.5 W seemed not to do the trick so I tried to raise the current (not easy with a stick, hiding behind a vacuum cleaner, afraid of exploding airbags)
Please fast forward to 1:40 where the inflation takes place.
You will hear a "pop" at the end of the inflation which is the temporary silicone sealing at the wires breaking.
A conclusion is that inflating the airbag works, and it is in a slow manner which is good.
Also, care must be taken while sealing the wires and the pressure sensor.
Efter en hel del strul så blev slutligen den senaste versionen av koldioxidtanken äntligen redo att testas. Tanken fylldes med 4 gram kolsyreis, vilket ger upphov till ungefär 2 liter gas vid rumstemperatur och atmosfärstryck. Det första testet var att se om tanken höll tätt, vilket utfördes genom att lägga ner den i en hink vatten. Resultatet, som kan ses i filmen nedan, visade att tanken läckte vi den yttre o-ringen, men 1 bubbla var 6 sekund. Den lilla o-ringen vid ventilen, som tidigare har läckt, visade sig hålla tätt däremot.
Efter detta genomfördes även ett "release test" av ventilen, detta med väldigt gott resultat, som kan ses i den andra filmen i inlägget. Ventilen öppnas på mindre än 1s när strömmen slås på, det huvudsakliga gasutsläppet sker de första sekunderna, men ett långsamt utsläpp av gas kan även noteras under perioden 5-20 s efter starten.
After quite a few problems on the way, the final version of the cartridge was now ready to be tested. The tank was filled with 4 grams of CO2 ice, which equals roughly 2 litres of gas at room temperature and atmospheric pressure. First a leakage test was conducted (see video below), performed by placing the tank in water, where 1 bubble was seen from the outer o-ring every 6 seconds. The smaller o-ring by the valve was air-tight however, which was a very good result.
After this, a release test was performed with the electrovalve, with a good outcome (see second video). The valve is opened in less than 1 second after the current is turned on. The main gas release takes place the first seconds, however a slow release of gas can also be noted during the time period 5-20 seconds.
Videos:
Leakage test
Release test